NFT have been presented as the perfect solution to many of the problems presented by recent technological advances.
Today, markets work differently and physical locations will soon become a thing of the past.
Because of this, many things that we know from their physical reality are now in the virtual world. An example of this is digital art.
As a result, industries such as the music industry have sought ways to avoid piracy and protect the copyrights of their songs, compositions or works of art.
What is an NFT?
Like a call to heaven, NFT or non-fungible tokens arrived that, through tokenization, allow a work of art or a digital collectible to be unique, unrepeatable but at the same time the NFT can be exchanged or sold.
Put another way, it’s a way to represent your rights and ownership of a product, image, tweet or whatever you can imagine and it’s all regulated through blockchain technology.
Of course, its potential is so huge, that the NFT market is huge and there are many platforms like OpenSea or Rarible taking advantage of this.
In fact, their innovation can be understood much more with the knowledge that Beeple, an American artist, sold an entire collection of drawings and daily works as an NFT worth $69 million.
However, in the face of this you may think that only developers can have an NFT. However, anyone, even a street artist who is not yet recognized for his or her immense talent, can create an NFT.
So, join us on this tour where we will learn how to create an NFT token by following a few simple steps. Let’s go!
How to create a non fungible token (NFT)?
Honestly, creating an NFT doesn’t require you to know much about cryptos, smart contracts, blockchain technology or non fungible token (NFT), the bottom line is:
-
- Have a cryptographic wallet because in this wallet your digital tokens will be stored. Preferably, a wallet compatible with Ethereum.
- Decide what you are going to turn into an NFT token and where you are going to market it.
- Once you choose a platform like Foundation, for example. Check which blockchain it was created on and which cryptos are compatible to create your NFT token on that blockchain. In the case of Foundation, it is created on Ethereum, so ideally you should create your NFT with ETH.
- After choosing a blockchain, keep in mind that you must own native tokens of the blockchain.If you don’t have them, you can buy them from us at Bitnovo from our main page, as creating an NFT has a transaction fee charge on the network. In the case of Ethereum, we are talking about gas fee.
For practical purposes, because many of today’s NFT platforms are built on top of the Ethereum network, let’s review how to do it with ETH and one of the broadest NFT marketplaces – Open Sea.
Create an NFT in Open Sea
Step 1: Login to OpenSea
Importantly, the process of creating a token on this platform is free, but it is important that you connect your wallet to OpenSea.
Also, you don’t need to list your NFT, as this site has no moderation in the content it can list, because the market is full of very diverse items.
After that, click on the “create” button in the upper left corner. There, you will be redirected to a page with options for connecting the wallet.
Then follow the steps below to connect your wallet to the platform.
In this way, you are automatically registered on the platform.
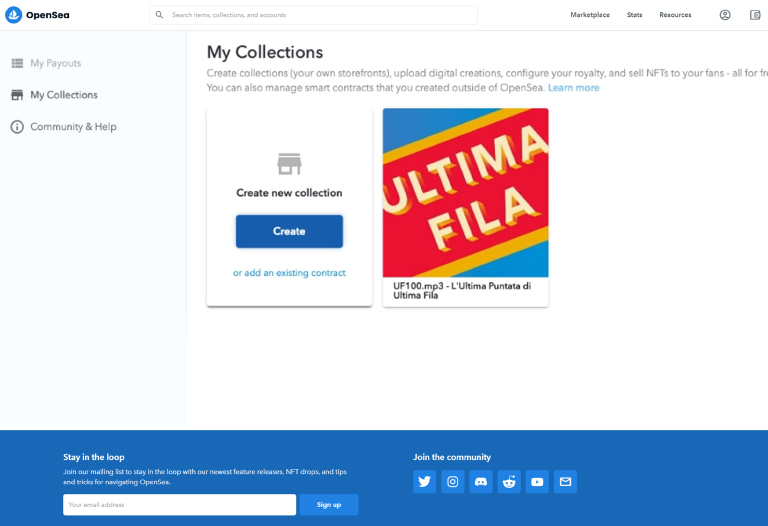
Step 2: Create a new collection
Initially, in “create” you will see “create new collection“, so click there.
Automatically, the platform asks you for a signature generated from the wallet to verify what you are doing. The only thing you have to do in this pop-up window is to accept.
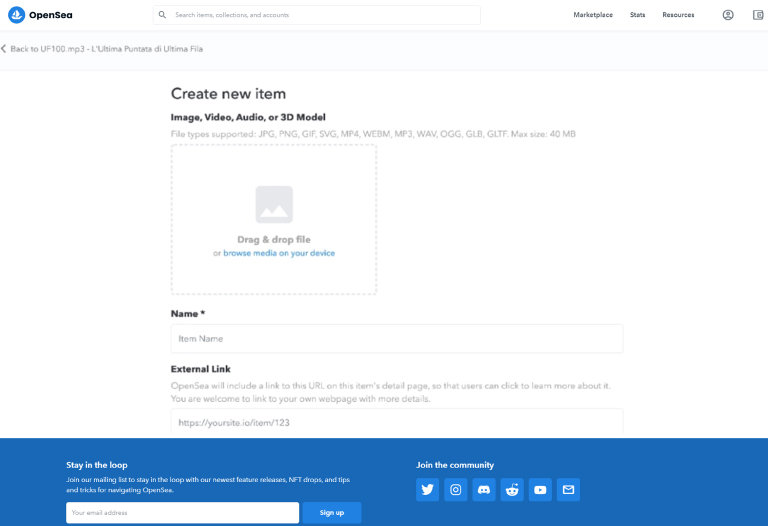
This is where the magic happens, because you can convert into NFT anything you want, be it a musical composition, a video, a photo, a design, etc.
Of course, it is essential that the file is your absolute authorship or that you own the copyright.
You can upload your file up to 100MB in a variety of formats, from PNG, GIF, SVG, MP4, WEBM, OGG, GLTF, among others.
Then, name them and if you have any additional links to a page, blog or YouTube video, you can include them to let collectors know more about the digital assets they can acquire.
This is the step commonly referred to as NFT minting or manufacture, issue and circulation.
Step 3: Sign your token
When you are ready, click on the “create” button. Then, you will see the “sign” window again to validate the creation, sign it again, and voila!
At this time, the platform does not charge you a transaction fee, but it will charge you when you upload the collectible.
Step 4: Put it on sale.
After creating it, the NFT does not go directly to the market, so you must offer it to the public. To do this, go to your profile, click on “my collections” and enter the page of your created NFT.
At this point, you hit the “sell” button. You can trade it in three ways:
-
- Establishing a selling price.
- Auctioning.
- Selling it in a group with other NFTs.
After selecting the form in which you are going to sell it, fill in the data of:
-
- The minimum offer you are willing to receive.
- The price you consider appropriate to reserve.
- The expiration date of the sale.
Afterwards, confirm the “post your listing” option and the platform will connect the wallet to process the transaction. At this point, you will be charged a fee from the Ethereum network to bring your collectible to the market.
Step 5: Enjoy your NFT.
You’re already more than in this world and you’re a NFT creator!
The only thing left for you to do is to wait for your objects to bear fruit and pay fairly for them. As a clarification, your NFT can be sold in ETH, DAI or USDC.
We hope you found this brief tour useful!
To be honest with you, in the NFT world, we have a lot to say, much more than we can convey to you in a single article.
So, to keep you up to date with the latest news in the cryptocurrency and NFT ecosystem, we invite you to continue exploring our blog.
See you next time, Bitnauta!