
Add your E-commerce store to Bitnovo Pay: Quick and easy integration
If you have an online store using popular platforms such as Prestashop, WooCommerce or Shopify, Bitnovo Pay offers you an easy way to integrate your E-commerce and start accepting cryptocurrency payments.
Here’s how you can add your store to Bitnovo Pay according to your preferred platform.
Prestashop: If you use Prestashop as your E-commerce platform, you can easily connect to Bitnovo Pay using our plugin designed specifically for this platform. Follow these steps for integration:
1. Download the Plugin: Go to our download page and get the installation file for Prestashop.
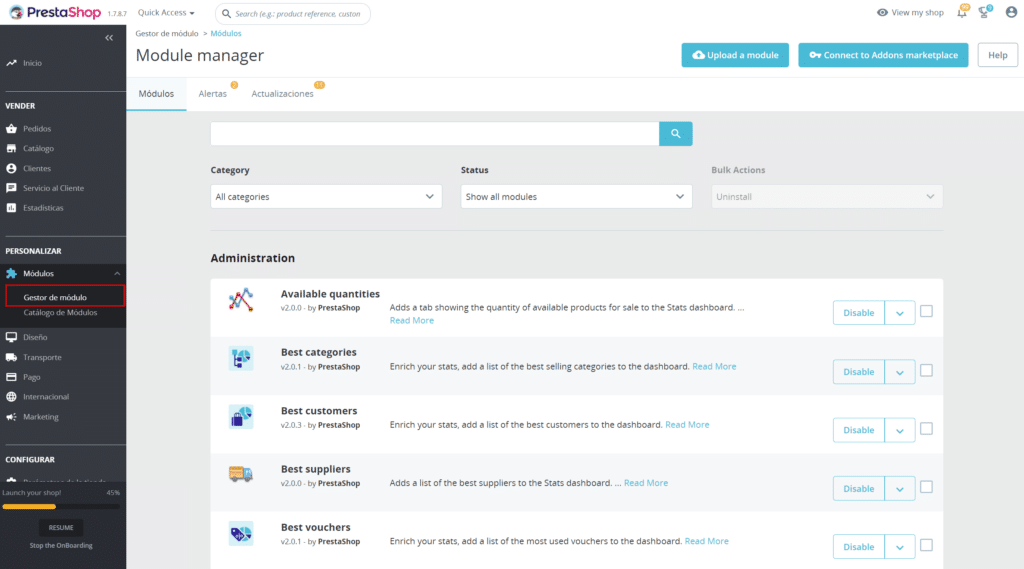
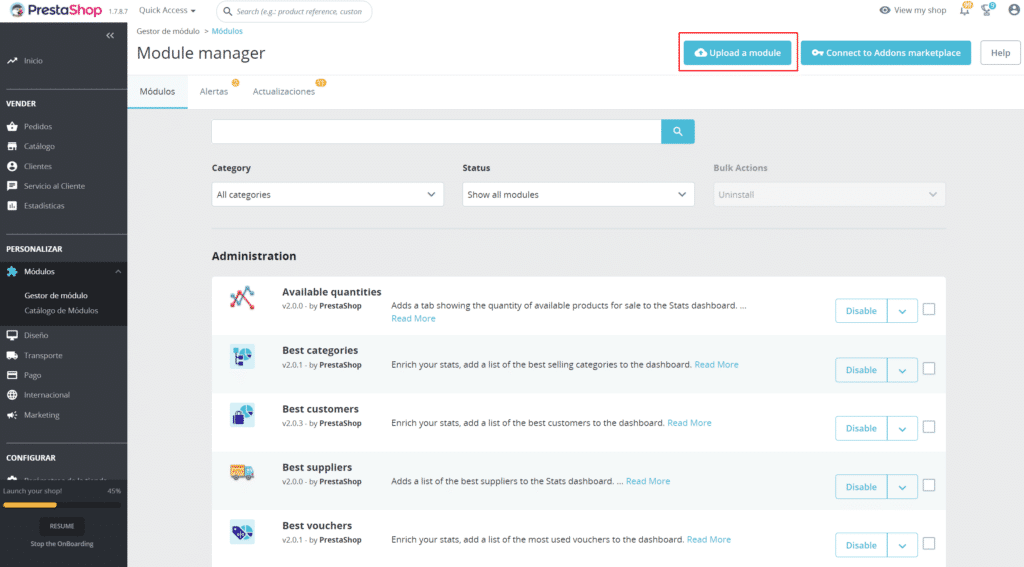
Installing the Plugin: Access the administrative panel of your Prestashop store and go to the “Modules” section. Click on “Module Manager” and then on the “Upload a module” button. Upload the Bitnovo Pay plugin file and wait for the installation to complete.
3. Configuration: Once the plugin is installed, go to the plugin configuration section. Here you must enter the credentials corresponding to the test environment (Sandbox) and the production environment (Mainnet).

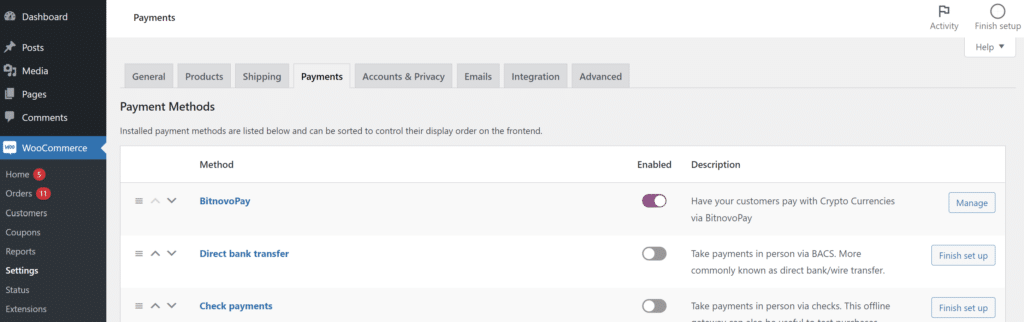
WooCommerce: For those using WooCommerce as an E-commerce platform, Bitnovo Pay also offers a specific plugin for easy integration. Follow these steps to add your WooCommerce store to Bitnovo Pay:
1. Download the Plugin: Get the latest version of our WooCommerce plugin, compatible with the platform.
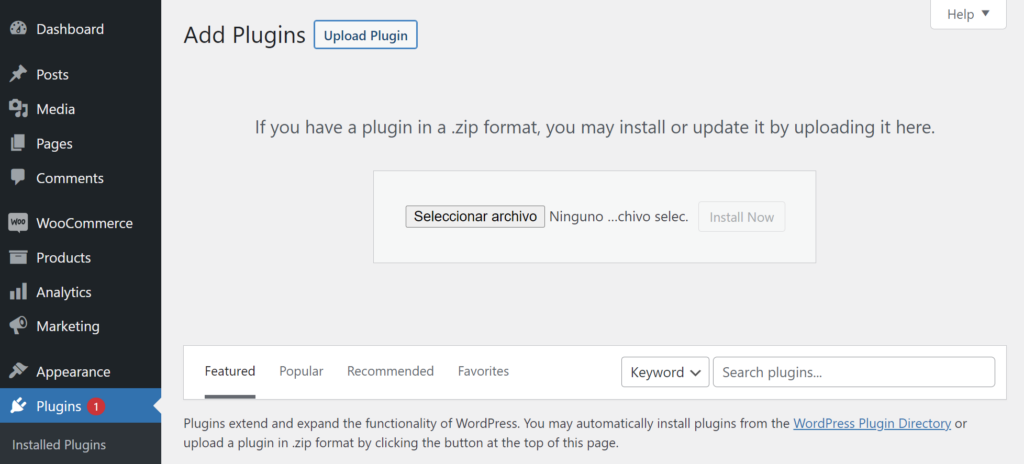
Installing the Plugin: Access the administrative panel of your WooCommerce site and go to the “Plugins” section. Drag the .zip file of the plugin you downloaded and click “Install Now”.
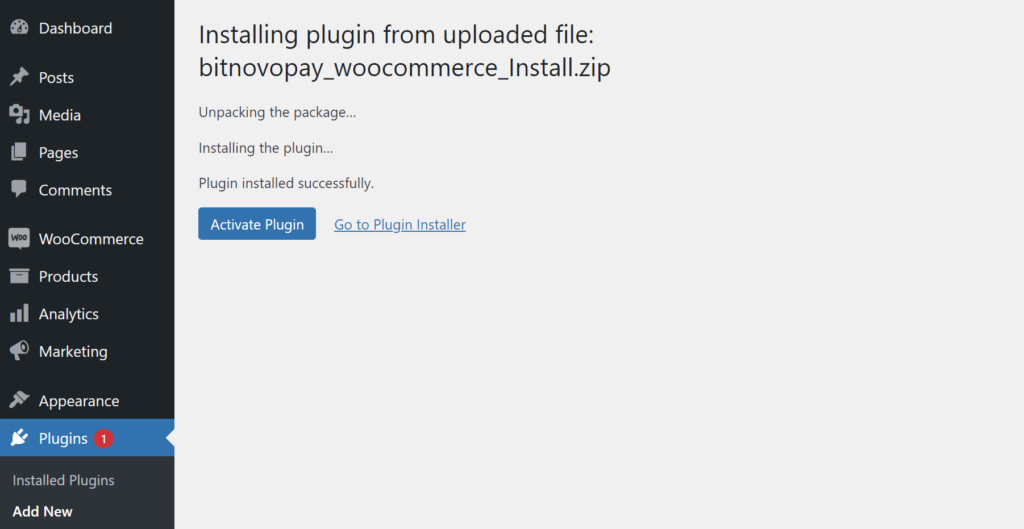
3. Plugin Activation: After installation, click on “Activate Plugin” to enable it.
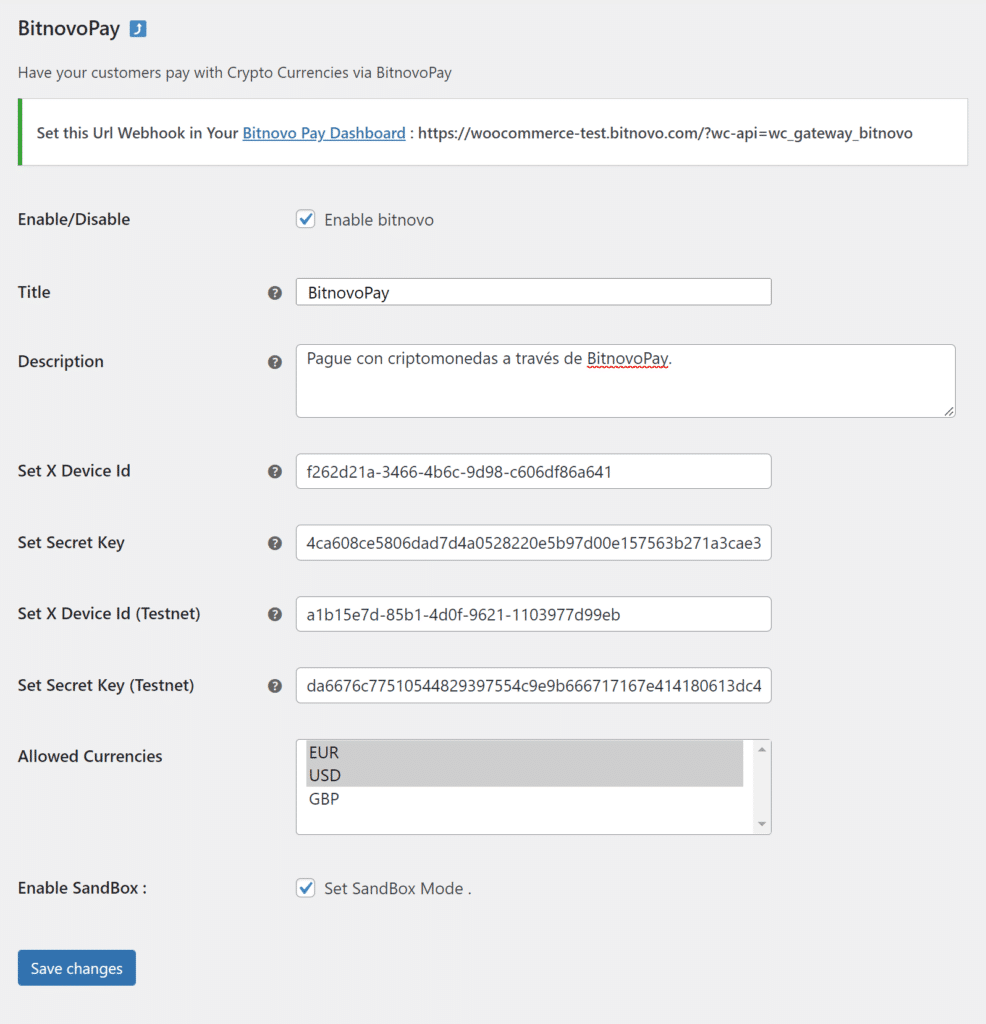
4. Main Settings: Go to the “Preferences” or “Settings” section in WooCommerce. Search for “Bitnovo Payment Gateway” and click on “Manage”. Be sure to activate the payment module and configure the options according to your preferences.
Configuration: In this section, enter the credentials corresponding to the test environment (Sandbox) and the production environment (Mainnet). Copy and paste the API Key provided by Bitnovo Pay and configure the Webhooks following the instructions provided by the WooCommerce plugin. You can customize the titles and descriptions that will be displayed on your payment gateway, select the currencies available in your online store and activate the test or production mode according to your needs.
With these steps completed, you will have successfully integrated your E-commerce store with Bitnovo Pay.
With this configuration you will be ready to accept cryptocurrency payments securely and efficiently. Take advantage of this integration to expand your payment options and provide your customers with a better shopping experience.